We first notice that the second row is "full", meaning all squares have to be part of horizontal segments. Because the third one is 21, the top right corner is walled off and unusable. Then, because column nine only has one sum, we can rule out vertical segments in the entire bottom half of that column.
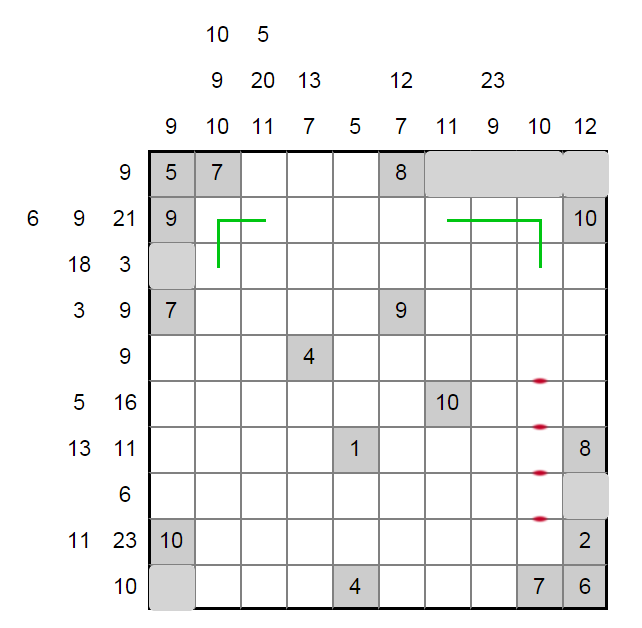
We can grey out the squares that would be dead ends in the lower right. Now, focusing on the 6 in row two: if it were (1,2,3) we couldn't get up into the top row at all. This must mean that it zigs upward immediately, as zigging down would cut off the top row entirely. We also know there is a vertical segment at the top of column six.
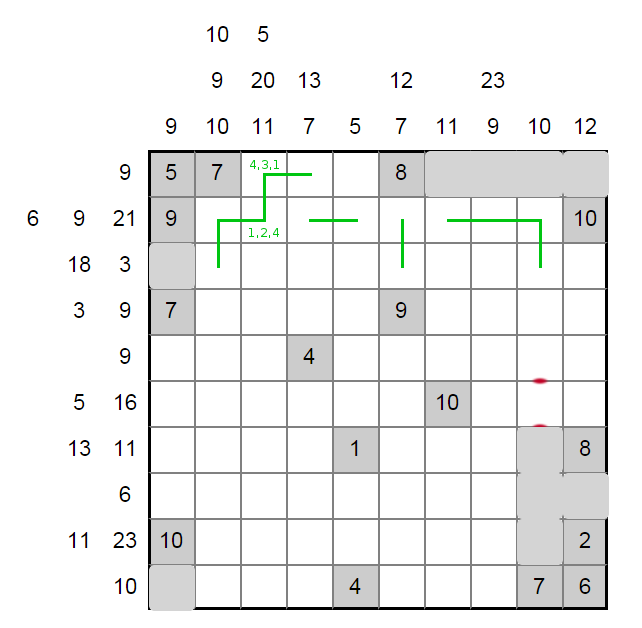
By brute force checking, the only way the 9 in the top row will work is by covering three squares, with a 4 on the left. Once we go down in column four we have to head right to avoid a loop (the 18 forces a segment covering at least three squares.)
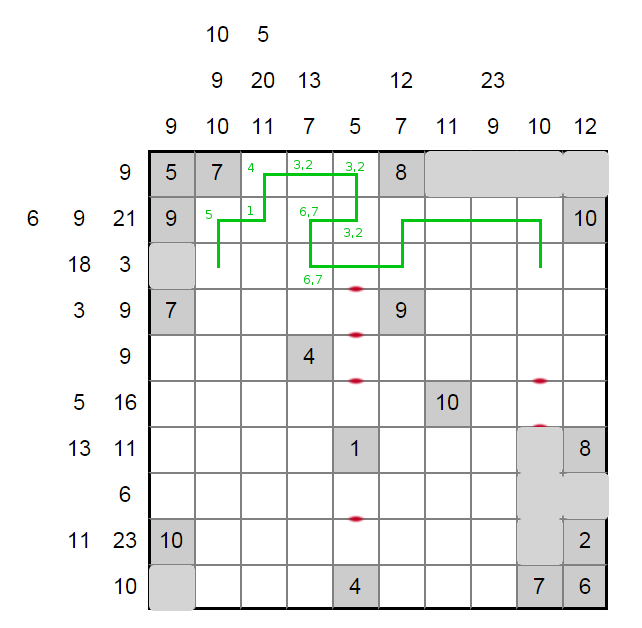
We can grey out some more squares, and then focus on column six's short segment. Column six row two can only be 7. With the top-center resolved, the 10 in column two must have three values, ending with a 1.
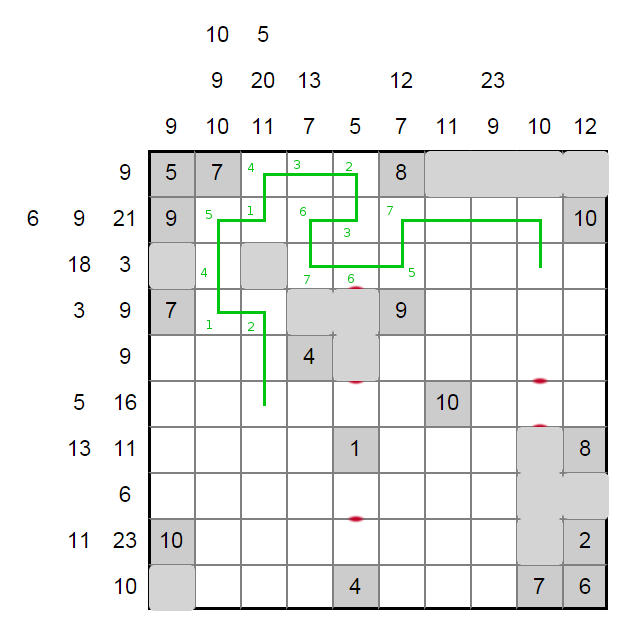
The next step may be the toughest. Let's try to make the 10 in column nine use 8 and 2. The 3 in row three can't go left, because the 23 would go too far down and ruin the loop. If the 3 went right, the 12 in column ten is not possible while also satisfying the givens in rows four and five and column eight. Therefore we can conclude that column nine's segment continues downward and the 3 in row three is in columns seven and eight. This has big effects on the paths our loop can take.
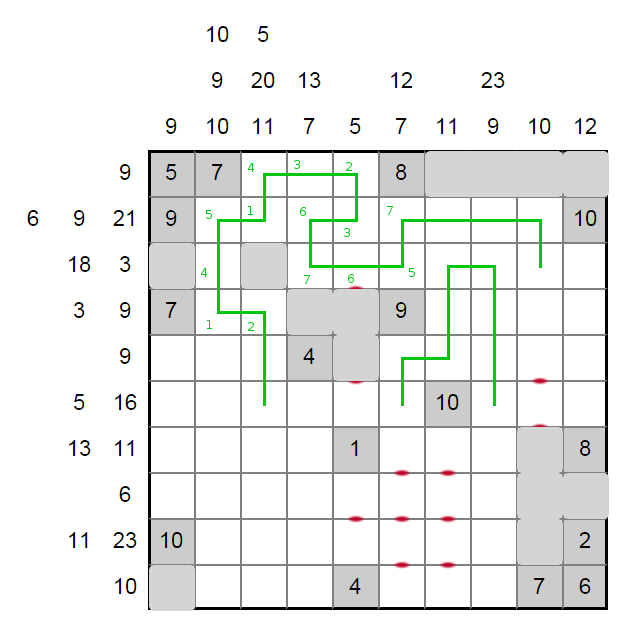
The 6 in row eight gives us some key grey squares in that row. This sends the loop around to the bottom left. Row nine is "full", which restricts the lower left of the grid even more. The 9 in row five and 16 in row six also have effects on the loop options.
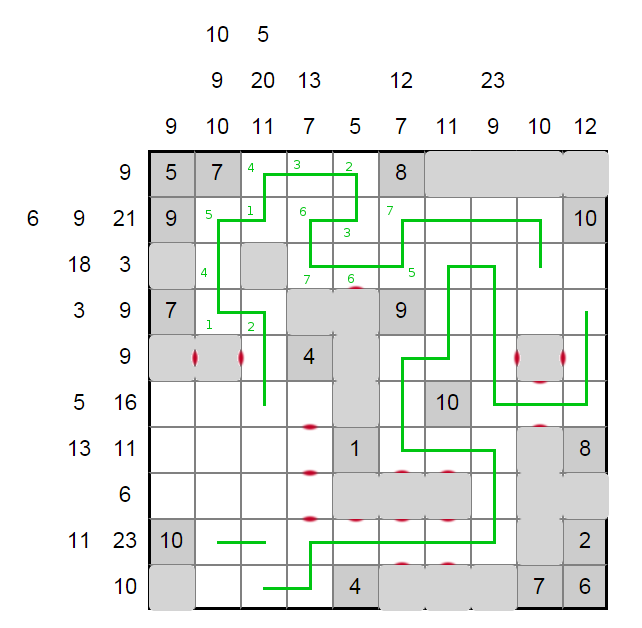
The 6 in row eight can't be three numbers, and the length two segment can't be directly over the length two segment in row nine. Along with needing three segments in column two, we can resolve the bottom left. With no more numbers in row three, the top right loop is resolved, and our loop is done.
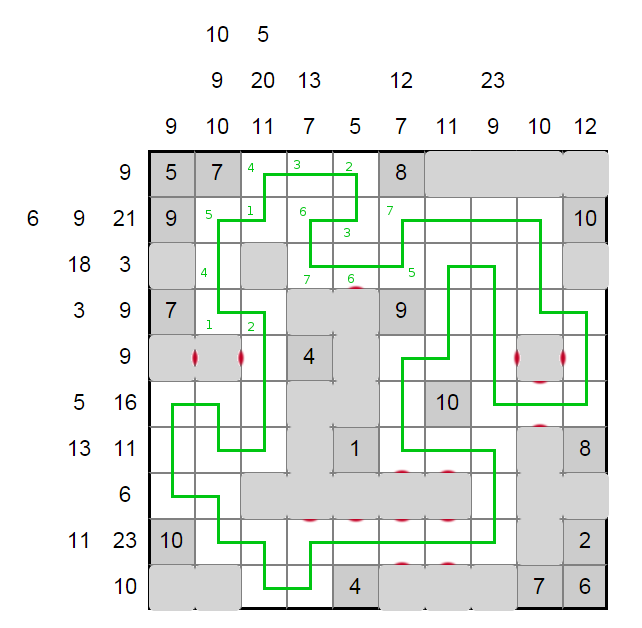
From now on, the logic is more familiar. Simple Kakuro-style sums and the row and column uniqueness get us all the numbers relatively easily. The 2,3 in row six is resolvable, which cascades along the left side.

The grey squares in column one are determined by uniqueness.

The 3 is forced in row three, and we have only a 2 or a 4 available above it. This resolves the 10 sum in column nine. The top right square can only be 1 after placing the 9 in row 3. This resolves the top row.

With the 1 placed in the top right, the 12 in column 10 can only be 4,3,5. The 11 remaining of the 16 sum in row six must be 7,4.

The right side now resolves in big chunks.
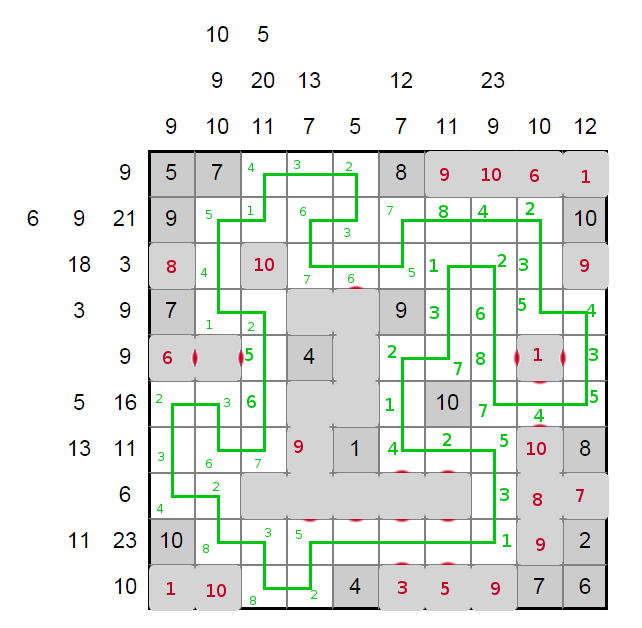
As does the row nine long segment, and then the remaining towers.
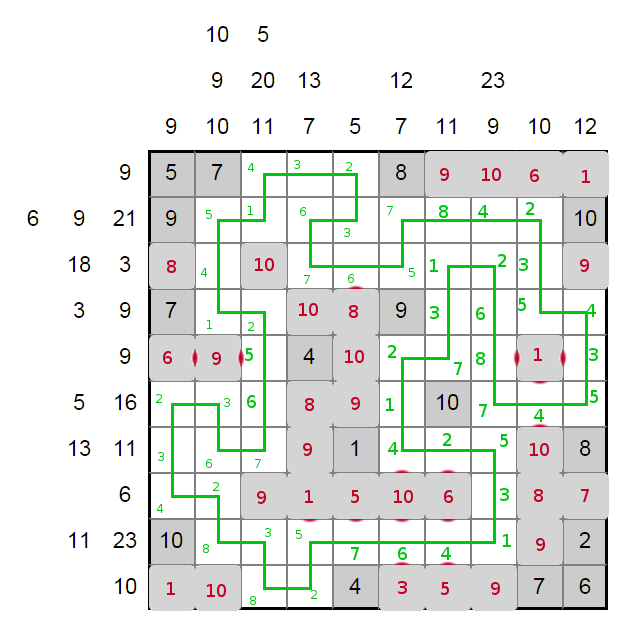
It's important to think of the roller coaster as a 3d object now. We haven't sent the path over any of the 9 or 10 high towers. This suggests that much of the roller coaster is hidden by those towers, when viewed from the side.
A natural way to look at the coaster is from the 6 orthogonal faces. The top face is represented by the logic puzzle we've just solved, but the four sides will have some towers and track visible among a forest of grey towers. Let's see what those look like.
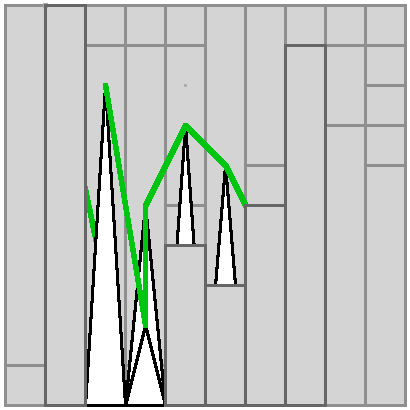
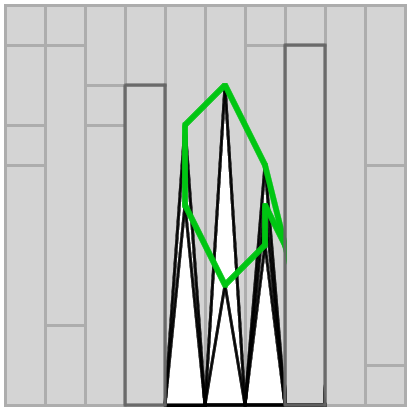
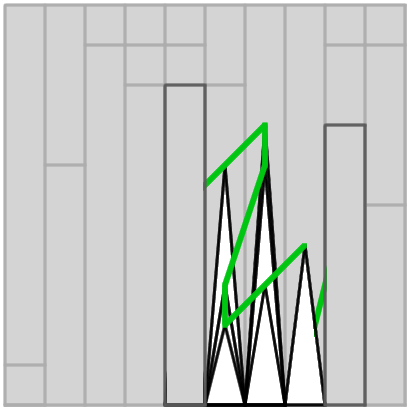

Ignoring the unfortunate stray lines that go from hidden tower to hidden tower, the sides in order make (lowercase versions of) R, A, Z, Z, for a final answer of
RAZZ
A solver provided an interactive 3-D presentation of this.
